Showing posts with label snacks. Show all posts

Friday, August 23, 2013

Whole Flax Crackers

Flax seed is weird. Not as weird as chia, but it's up there. When you soak flax in water, it gets gooey and sticky and spongy. You should try it some time.


So capitalizing on this weird flax phenomenon, let's soak it in water and make a fucking cracker out of it. Again, sorry, this is a dehydrator recipe. If you don't have a dehydrator, you can try sticking these in your oven at its lowest setting for 10-12 hours. Generally, that mimics the idea.


Raw Flax Seed Crackers
  • 2 cups whole flax seeds (I got mine from Trader Joes)
  • 2 cups of water
  • 1/4 cup soy sauce
  • 1 tablespoon of sea salt 
  • 2 tablespoons of Sriracha (optional)
  • 1 tablespoon of lime juice (optional)

First things first, you need to soak these seeds for about two hours. That's what's going to allow them to reveal their secrets to you.


Then, you mix in the other crap. Mixy mixy.


Spread out thin on a silicon mat. Don't have a silicon mat? You should get one. They are cheap and awesome. The thickness should be about 2 seeds thick.

Then, pop into your dehydrator. After 4 hours flip them over, like so. Continue dehydrating for another 2-3 hours.


When they are done, you can rip the sheets apart to make crackers. Or you can leave them intact to make GIANT CRACKERS OF LITTLE UTILITY.


Tuesday, August 13, 2013

Sriracha Kale Chips

After I popped a batch of these into the dehydrator, I climbed onto the roof to watch the meteor shower. I came down about two hours later to find they had been scavenged from the racks.

Sriracha is magic.

Ok, we generously received the bounty of a neighbor's kale harvest. And nature is beautiful and photosynthesis is great and yadada, I smothered the leaves in sriracha and dehydrated it. Yeah, that's it. Rip the stems off, smother in sriracha, and place on the racks.


Desiccate for two hours. Done.


Wednesday, August 7, 2013

Watermelon Chips

For this recipe, you need a food dehydrator and possibly some silpats. You can dry fruit in the oven (your lowest setting, so usually 180 to 200 degrees) but it's less energy efficient.


Basically, all you do is slice the watermelon into slices only a hair thicker than 1/4". Any thicker and you'll get chewy watermelon taffy that looks like this:


 Not a bad thing, just different.

These need to dehydrate for about 8 to 10 hours.

They are delicious. 

Tuesday, July 23, 2013

No-Bake Almond Oat Coconut Date Bars

Long hiatus. Moved to California. Now have access to a bigger and grander kitchen that came already stocked with all kinds of exotic flours and dried beans and nuts and shrugs as to what to do with them. Yay for me! Yay for you. Yay for us.

Anyway, so today I found a bag of dates in the pantry. Dates are basically ugly balls of natural sugar with pesky little seeds that you have to take care to remove. To be frank, I've never actually used dates before. These are not in my usual repertoire of food objects, so today is an experiment.

To make these bars, you'll need a food processor. I used my brand new Nutribullet which I love because when it's not being used to create edible things, it's being used to facilitate my consumption of absurd amounts of greens that I would otherwise never put into my system. I'd dedicate a blog entry to it, but honestly,  "handful of spinach and a banana..." not very interesting. 

So, right, food processor. 

No-Bake Almond Oat Coconut Date Bars 
(adapted recipe from Oh She Glows)

  • 1.5 cups of almond meal (ground almonds)
  • 1.5 cups of oats
  • 1/2 tsp. sea salt (or kosher salt or any salt, whatever, who cares)
  • 10 pitted dates
  • 1/4 cup coconut oil
Filling (make separately)
  • 30 pitted dates
  • 1/2 cup water


1. Process the almonds, oats, 10 pitted dates and salt until you get a crumbly meal. Then add the coconut oil (melt first if solidified). 

2. Press about 1/4 of the mixture into the bottom of a glass-bottomed 8x8" pan. 

3. Process the remaining 30 pitted dates with 1/2 cup of water until you get a sticky date goo. (Mmmm, goo.)

4. Press the goo into the pan, over your pressed meal layer. 

5. Press the remaining meal over the goo layer.

6. Refridgerate at least 1 hour, preferably 8-10 hours.

7. Don't do what I did which was to wait 45 minutes and be super impatient about it because you're wicked impatient because you'll get something crumbly and messy like what you see below and not the professional-looking bars that other bloggers seem to achieve. But it tastes good.


(mmm. goo.)


Saturday, February 2, 2013

Frozen Greek Yogurt

So frozen yogurt. Frozen yogurt is sort of healthy. Kinda? I mean, it's better than eating a pint of heavy cream and egg yolks, sure, but it's still not really doing anything for you. A normal 1/2 cup serving of Pinkberry with no toppings weighs in at about 120 calories--virtually all of it carbohydrates that your body can't really distinguish from sugar anyway. And there's almost nothing in it nutritionally except a smidge of calcium. And me being the white-trash wunderkin, I can't understand how people throw away $5 on fancy coffee drinks let alone this shit. At least coffee is a drug.

And as my friends like telling  me, I am known for saying, "Hey, I can make that better at home" a lot. I'm kind of a dick about it. Mostly because I hate when people throw money away on stupid things but also because I can make that at home. Cheaper. And better for you.

How am I going to do it? Chobani. We're basically just going to take a container of Chobani and dump the entire thing into my ice cream maker. (Ok, you know how I said earlier this week I don't own any fancy kitchen crap? I lied. I have an ice cream maker. I have this one, specifically. It's pretty awesome because I make this recipe a lot. Maybe once a day in the summer time.)

Frozen Greek Yogurt

32 oz container of plain Greek Yogurt (fat-free or low-fat, doesn't matter)
1/4 cup sugar (optional)
1 tbs. vanilla extract (optional)

If you're using my ice cream maker, you just place the frozen ice cream chamber (what the hell is it called?) into your ice cream maker, dump the yogurt and other crap in and let it transmogrify. It'll look like this after about 20 minutes.


Then you can put stuff in it. Any stuff. Here I put in some stewed blackberries. Nom.


No fat and a cup of this stuff weighs in at maybe 200 calories and 24 grams of protein (OR HALF OF MY RECOMMENDED PROTEIN ALLOWANCE NEED FOR THE DAY, PEOPLE. FUCKING VEGETARIAN POWERHOUSE, HERE.)

Friday, February 1, 2013

Sriracha Hummus (light)

When I donate blood, at least a fourth of it is extra virgin sriracha. Obviously, I'm going to make sriracha hummus. I make sriracha everything.

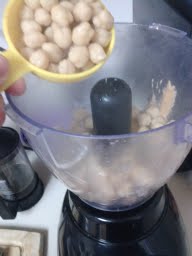
For this recipe, you will need 3 cups of garbanzo beans (see here for my suggestion about using dried beans over canned). Then most of the usual hummus suspects. Sriracha (duh). Aaaand the secret to it being light? Greek yogurt.

So before we get started let me tell you that hummus is not low fat. Much of its fat comes from the tahini and olive oil. For my recipe we are going to swap out about half the lipids in favor of fat-free Greek yogurt (we're talking about cutting out 28 grams of fat or about 250 calories). I don't miss it and I've forced others to eat this and no one has ever noticed.

Sriracha Hummus
(Modified from here)

3 cups chickpeas
2-4 tbsp. Sriracha sauce (I would use ten but I'm superhuman)
1-2 tbsp. Olive oil
1 tbsp. Peanut butter
2 tbsp. Greek yogurt
1/4 cup lemon juice
1 tbsp. Minced garlic
1/2 tsp. Cumin
Sea salt to taste

Again, puree this all until it looks like you pureed a bunch of crap. Then if you're like me, serve half of it to others and reserve the other half to put more sriracha in because your friends are weak.


Wednesday, January 30, 2013

Coffee Cake Hummus

I had the realization this afternoon that chickpeas are probably so-called because they resemble tiny roasted chickens after they have soaked. See?


Have you ever made this connection? I haven't until today and my mind is still reeling.

Ok, so in honor of my discovery, I'm going to throw at you an experiment. This experiment is titled Coffee Cake Hummus. Traditionally, hummus is made from pureed chickpeas and a paste made from sesame seeds called tahini. Usually, it's flavored with savory spices and you see combos of pre-packaged hummus flavored with things like roasted red pepper or lemon garlic. You don't see sweet hummus, though. Which I have always thought kind of weird, because chickpeas and other light-colored beans are pretty flavor neutral. Mixed with peanut, almond or cashew butter, you'd have a pretty solid base for almost any mix-in. 

I researched dessert hummuses and discovered a sort of cottage industry of food bloggers inventing their own nut-based hummus recipes. The recipe I'm modifying today is Chocolate Covered Katie's recipe for Snickerdoodle Dip. There are no major complaints with her recipe as is, except I'm not going to use canned beans (which means less salt), I'm going to tweak a few basic ingredients and I'm going to omit baking soda (the extra sodium doesn't seem to be necessary).

In order to make this recipe, I strongly recommend buying a package of dried chickpeas and soaking them ahead of time. A bag of dried garbanzo beans costs $1.29 here in Somerville and makes about 5-6 cups prepared (or the equivalent of 3 cans).


Cover them with water overnight in a bowl in your fridge. They will pretty much triple in size as they rehydrate, so make sure you leave lots of room and use lots of water--more than you think they can use. Then rinse them off, covering them with fresh water in a large stock pot. Then boil according to the directions on the back of the bag (Or until they're tender. This isn't rocket science.) 


Coffee Cake Hummus

3 cups of prepared beans
1 half of a small apple, diced (or use 1 tbs. applesauce)
3 tbs. cashew butter (or peanut butter. Or almond butter. It all tastes fine.)
1/2 to 3/4 cup amber honey
2 tsp. vanilla extract 
3 tsp. cinnamon
pinch of sea salt


Basically, you dump all of this in a food processor and blend. I don't have a food processor. I have a food-processor-like attachment that came with my blender. It works fine. Me being single, I don't have the fancy-ass kitchen equipment people give you when you get married that ends up on top of the kitchen cabinets alongside the crepe-maker and the fondue set you registered for during your pre-matrimonial powertrip. Yeah, you know who you are. Or at least I know who you are.

I'd take a picture of this, but it's not photogenic. It's brown. Whatever.

You eat this with apple slices. And your fingers. I promise to keep working with this base recipe. It's good now and a lot better for you compared to, say, eating frosting out of a can. It's like high-fiber nature frosting you eat out of a blender, which I console myself is better than that incipient drinking problem that creeps up behind me every few weeks and whispers, "'sup?" 

Tuesday, January 29, 2013

Stupid Easy Refrigerator Pickled Peppers

This recipe came as the result of an experiment with refrigerator pickled carrots. While that was good, this was better. And easier. And less salty.

I love red peppers. I eat at least several pounds a week. So when I realized I could just take the brine from the carrot recipe, pour it over a jar of sliced up peppers and toss it in the fridge, I was delighted. I love stupid easy things. 

Refrigerator Pickled Peppers
5-6 Red Peppers, deseeded and cut up into slices
2 Cups of warm water
3 Cups of white vinegar
1 Cup of Sugar (I use white, but you could use brown, too.) 
1 tsp. salt
Arrange the pepper slices in a tupperware container or jar like so.


Mix the pickle brine by adding the water, salt, vinegar and sugar until the sugar dissolves. Pour over the  pepper slices. Seal it up and throw in the fridge. Wait for at least 24 hours before you eat them. They will be tasty and you will be happy.